Showing posts with label Breakfast. Show all posts

Tuesday, February 10, 2015

Hash Brown Quiche

I've said it before and I'll say it again - I love brunch.  I want to invite people over at least once a month so I can enjoy the decadent dishes I can get away with making.  In addition to my french toast, my go-to brunch dish is this hash brown quiche.  It combines eggs and potatoes in one delicious bite.  And (bonus!) after you pre-cook the hash brown crust, you bake the eggs at the same temperature as the french toast.  I pop it in the oven 15 minutes after the french toast goes in, then I even have time for the quick clean up before my guests arrive!


I have mixed it up a little as well since I started making this.  I've added mushrooms, switched out different kinds of cheese, etc.  So you can add your own personal twist to cater to your family's tastebuds.

This dish is also toddler approved (though you may have to tell them it's "cheese" or else they won't eat it).

Hash Brown Quiche (slightly adapted from Paula Deen)

Ingredients
3 cups shredded hash brown (either freshly shredded potatoes or thawed from frozen)
4 tbsp (1/2 stick) melted butter
3 large eggs
1 cup half-and-half
1/4 cup diced scallions
1 cup shredded cheddar cheese
salt
pepper

Directions
- Preheat oven to 450 degrees, F
- In a colander, gently press potatoes with a paper towel to squeeze out excess water.
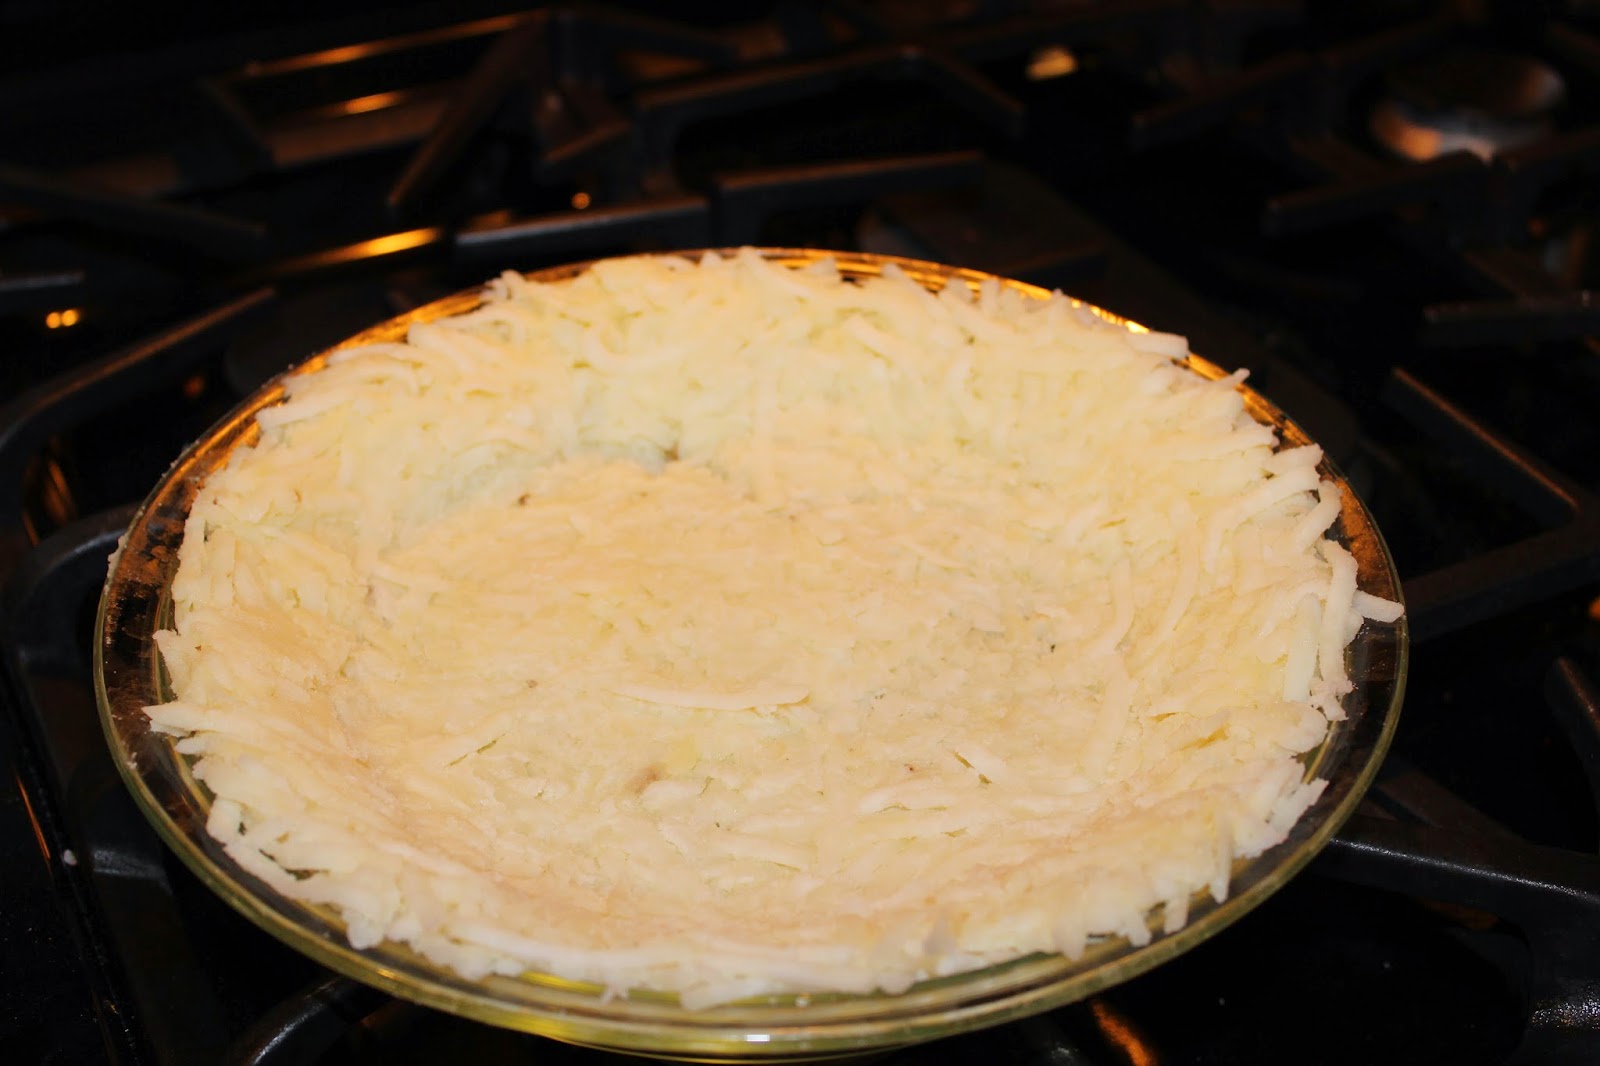
- In a greased 9in pie plate, toss potatoes with the melted butter until well combined.  Then press the potato into the bottom and sides of the plate to form the crust.
- Bake for 20-25 minutes until it starts to turn golden brown and starting to crisp.  When you remove it from the oven, lower the temperature to 350 degrees F.
- In a mixing bowl, whisk together the egg and half-and-half.  Then stir in the scallions, cheese, and salt and pepper to taste.
- Once the potato crust is out of the oven, pour the egg mixture into the center of the crust.  Use a spoon or spatula to spread out the cheese and scallions.
- Bake for 30-40 min (at 350) until the center is puffy and light golden brown.

hash brown crust, ready for the oven

Tuesday, December 23, 2014

Overnight Caramel French Toast

I love having people over for brunch.  Breakfast food is one of my favorite types of food, and any time I can get a bit indulgent and fancy I am in heaven.  

One dish that I love making is overnight caramel french toast.  My father makes this dish every year for his annual break-fast gathering.  About a year ago I asked him for his recipe, which he found online. (He doesn't remember the website but it is similar to this one.)  I knew it wasn't healthy, but his recipe was a bit much for me (1/4 cup + 2 tbsp corn syrup?!?!).  I did a little online search and came across a similar recipe from Betty Crocker.  I did a little back and forth between the two recipes and added a little bit of my own twist and settled on this delicious dish.

I have served this a few times now and it has always been received very well.  Plus, you prep it the night before so you don't need to worry about doing much the next morning.  It's great for a crowd as part of a brunch but also a few pieces reheated the next day (on the rare occasion that there are leftovers) make a perfect quick breakfast.  It's not something I would make just for my family, so makes me want to invite people over for brunch more often!


Overnight Caramel French Toast (adapted from a passed down recipe [source unknown] with inspiration from Betty Crocker)

Ingredients
1/2 cup (1 stick) unsalted butter
2 tbsp light corn syrup
1 1/4 cup packed light brown sugar
1 loaf french bread, sliced into 1 1/2 in pieces
4 eggs
2 cups skim milk
1 tbsp vanilla
1/4 tsp nutmeg
cinnamon sugar

Directions
- Spray a 13x9 baking dish with non-stick cooking spray
- In a medium saucepan, mix the butter, corn syrup and brown sugar over medium heat, stirring constantly until bubbly (do not boil).  Pour evenly into the baking dish.
- place the slices of french bread in a single layer over the caramel sauce, filling the baking dish.
- In a medium bowl, whisk the eggs, milk, vanilla and nutmeg.  Pour the mixture evenly over the bread.  Cover and chill at least 8 hours.
- Uncover, sprinkle evenly with cinnamon sugar.
- Bake at 350 degrees for 45-50 minutes, until golden brown and bubbly.

Friday, November 14, 2014

Baked Apple Cider Donuts

After a hiatus I am happy to say that the recipe swaps I used to participate in are back!  Now being run by Ashley from Cheese Curd in Paradise, this month was a Blogger's Choice theme.  I was assigned Eva Bakes.  After drooling over 99.9% of her posts, I finally settled on a recipe.  The added bonus was that we had just received some fresh apple cider in our CSA box last week!


Image and video hosting by TinyPic


In December of 2012 for my office holiday gift exchange I was gifted several requested baking items, including a donut pan.  When I asked for it I had grandiose plans of making homemade donuts all the time.  Fast forward to November 2014 and you can tell by the packaging currently in my trash can how well that plan worked out!


It turns out that donuts are really not hard to make at all.  These are cake donuts so they are a drier consistency than a puffy yeast donut would be, but it does not take away from the taste at all.  I made two adjustments from what Eva did (though they both were done in the recipe she based it off of).  First, I used cardamom that she didn't use.  I love the smell of cardamom.  It's one of those spices that costs approximately $12 and you need about 1/4 tsp or less in most recipes that calls for it.  But once you have it in your pantry you don't want to leave it out!  I had purchased it for last year's Crunchy Molasses Cookies and have been waiting for a reason to use it again.


I also added a cinnamon sugar coating to about half of my donuts which I think added a nice touch (I left them off of some because I knew a little someone's nibbly fingers would be all over these donuts and didn't want the added sugar for him).


As Eva also realized, although the original recipe said it makes 6 donuts, I was able to make 11.


Baked Apple Cider Donuts (from Eva Bakes)


Ingredients
1 cup apple cider
1 1/4 cup white whole wheat flour
1 tsp baking powder
1/2 tsp baking soda
1/4 tsp salt
1/2 tsp cinnamon
1/4 tsp nutmeg
1/4 tsp cardamom
3 tbsp butter, softened
1/4 cup sugar
2 tbsp brown sugar
2 tbsp olive oil
1 egg
1/2 cup milk
2 tbsp melted butter optional
cinnamon sugar optional


Directions 
Preheat  the oven to 400 degrees F.  Prepare your donut pan by adding cooking spray to each of the wells.
-  Boil the apple cider down in a small saucepan until it reduces down to 1/4 cup. Set aside and let cool.
- In a medium bowl, whisk together the flour, baking powder, baking soda, salt, cinnamon, nutmeg and cardamom.
-  In the bowl of an electric mixer (or a large bowl using a hand mixer), cream together the butter and sugars. Add the olive oil, reduced apple cider, and egg. Slowly add the dry ingredients into the wet ingredients alternately with the milk, ending with the flour (dry) mixture.
-  Spoon the batter into the prepared donut pan and bake for 9-10 minutes or until golden.
-  Remove the donuts from the pan and let cool completely on a wire rack before glazing.

- If you want to add a cinnamon sugar topping, you can brush the donuts with melted butter and dip into or sprinkle with cinnamon sugar.

Wednesday, September 17, 2014

Getting Ready for Rosh Hashanah


We are a week away from Rosh Hashanah and I'm sure everyone is planning their new year menus.  I have placed my order for whitefish, carp and pike so I can make my gefilte fish on Tuesday.  I may also whip up some noodle kugel.

If you are in search of some new ideas on how to ring in a sweet 5775, I asked some blogging buddies for dishes that use honey and here are a few other recipes I'd like to share:

***All pictures belong to the blog I link the recipe to***


Start your day off with these delicious breakfast ideas:
Honey butter croissants (from Hop's restaurants)
Honey Butter Croissants from Eva Bakes


Honey Almond Granola from Books & Cooks


Grapefruit Honey Cereal Muffins from Adventures in My Kitchen


grapefruit scones 5

Grapefruit Honey Yogurt Scones from The Way the Cookie Crumbles


And end your meal with some of these sweet treats:


Honey Cake that I posted in September 2012


 Karidopita (Greek Walnut Cake) from Elly Says Opa


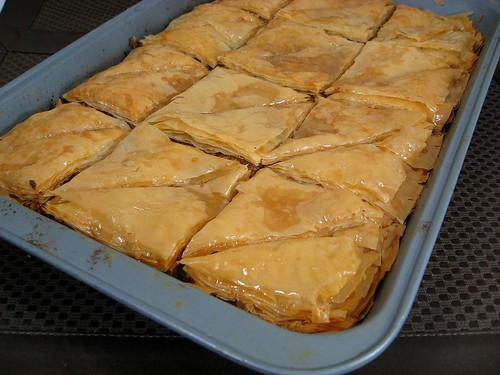
Baklava from Elly Says Opa

honey ice cream 4

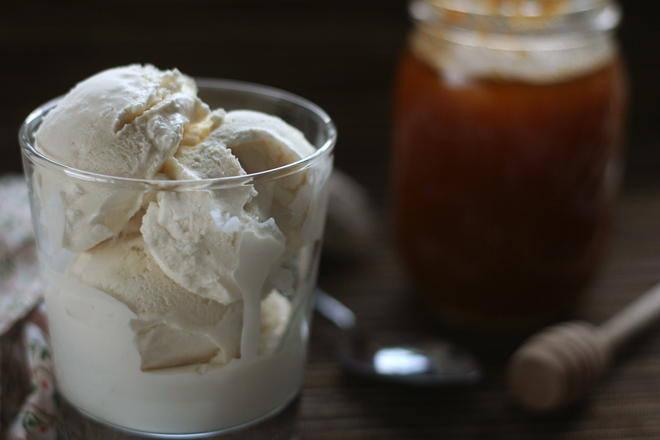
Honey Ice Cream from The Way the Cookie Crumbles


I hope these recipes help you have a sweet new year!

Friday, August 29, 2014

Whole Wheat Cinnamon Raisin Bagels

Can you believe it's almost September?  Where did the summer go?!  I know I have been MIA for most of this past year, but I thank you all for bearing with me.  There are some exciting things happening in my life right now - my little guy just turned 1 this past week, and as of a few weeks ago I am officially a stay-at-home mom.  What does that mean for you?  Well, hopefully I'll use my "extra" time (nap time and those few moments where he actually entertains himself without stirring up some trouble) to cook more and blog more!  If you've stuck with me during my crazy past year and a half (moving, new baby, etc) I assure you that I will be blogging more often now.


A few months ago What's Baking announced the theme of "Baking your Heritage", which ended up being sidelined for the summer produce theme back in June.  My original thought was to bake my own challah, which I've been wanting to do for a while.  But when the theme came back for this month's challenge I wanted to go a little crazier.  So I looked through a few of my Jewish cookbooks and had an "aha" moment.  What's more Jewish than bagels???!  I excitedly bought the few ingredients I needed (I had to replenish my whole wheat flour and buy bread flour and yeast, everything else was already in my pantry) and set aside a rare child-free morning to tackle this challenge.


It was surprisingly easy to make bagels.  I broke out the dough hook of my mixer to knead the bread which I think helped a lot (though you don't need to knead for as long, my mixer started smoking after 5 minutes!).  These were so simple that I think I'll try again with other kinds of bagels as well.  What I especially love about them is that I can make them whatever size I want.  We love bagels but try not to have them too often since the ones we buy at the local bagel store are approximately the size of my face (ok, I'm exaggerating - they are the size of my one year old's face).  So having these slightly smaller homemade ones are great to have on hand.  I ended up with 11 bagels of varying sizes so we'll have a few over the next day or so and can freeze the rest to enjoy in the future.


Ingredients
1 1/2 cups warm water
4 tsp dry yeast
pinch of white sugar
2 tbsp vegetable oil
2 tbsp honey
1/4 cup brown sugar
1 1/4 cups whole wheat flour (use white whole wheat for a lighter texture)
4 tsp ground cinnamon
1 1/2 tsp salt
3 cups bread flour, plus more as needed
1 cup plumped dark raisins
1 egg white, beaten

for the kettle water:
6 qts boiling water
2 tbsp. brown sugar


Directions
- In a large bowl, stir together the warm water, yeast, and white sugar.  Let the mixture stand for a few minutes to allow the yeast to swell and dissolve.
- Whisk in the oil, honey, and brown sugar, stirring to blend.
- Stir in the whole wheat flour, cinnamon, and salt.  Blend well.
- Add 3 cups of bread flour and knead for 10-12 minutes, adding more flour as needed to make a firm but smooth dough (***with my stand mixer I only kneaded the dough for about 7 minutes and didn't need any additional flour).  Let dough rest for 5-10 minutes.
- While the dough rests, heat a small bowl of water (enough to cover raisins).  When water is hot, add in raisins and let them sit for a few minutes.
- Knead or press the raisins into the dough.
- Please the dough on a work surface and cover with a clean tea towel or plastic bag, and allow it to rest for 10 minutes.
- Divide the dough into 8-12 portions (depending on desired size of bagels).  Form each portion into a rope about 10 inches long.  Form the ropes into bagels, sealing the ends by using wet fingers to press together, then roll on the work surface.
- Let the bagels rise about 20 minutes until they appear a little puffy.
- While the bagels rise, bring 6 qts of water with brown sugar added to a boil.
- preheat the oven to 450 degrees.
- Line a large baking sheet with parchment paper.
- Once the water is boiling and bagels are puffy, place a few bagels at a time in the boiling water.
- As the bagels come to the surface, flip them over and cook for another minute.
- Remove the bagels to the baking sheet and let them dry briefly.
- Brush each bagel with the beaten egg white for extra shine.
- Place the baking sheet in the oven and reduce the heat to 425.
- Bake (turning once midway) until the bagels are medium- or golden-brown, 18-22 minutes.

Wednesday, June 25, 2014

Blueberry Coffee Cake

Summer is here!  I am so excited to use all the great produce out there.  Who doesn't want to enjoy some fresh berries?!  I was pondering what to make for this month's What's Baking for the summer produce theme when Jenn from Jenn Cuisine mentioned a blueberry coffee cake that was a family favorite from when she was growing up.  I love blueberries so this one jumped straight to the top of my list.


I had also recently received a wonderful gift of salts, sugars and other spices from myspicesage.com. One of the sugar I was gifted was a blueberry flavored sugar.  I ended up mixing this with the brown sugar in the topping which I think added a little something extra to it.

This was very easy to make, although I did have a little snafu with the topping.  In my head it said melted butter which wasn't the case, though in the end I think it tasted pretty good as I made it.  I used light sour cream, 1/3 less fat cream cheese and Skim Plus milk which made me feel a little better about the multiple slices I ate.  The cake is pretty big, so this is definitely one to share.


Blueberry Coffee Cake (from The Main Wild Blueberry Cookbook)

Ingredients
Cake:
3 cups flour
1 cup sugar
4 tsp baking powder
1 tsp salt
3 eggs, slightly beaten
1/2 cup sour cream
2 /3 cup milk
1 1/4 tsp vanilla
1/2 cup butter, melted
2 cups blueberries, drained
8oz cream cheese, cut into 1/2 in cubes

Topping:
1/4 cup flour
1/3 cup brown sugar
1 tsp cinnamon
1/4 cup butter
1/2 cup chopped pecans

Directions
- preheat oven to 350 degrees
- grease a 9 x 13in pan
- combine flour, sugar, baking powder and salt.  Set aside
- in a separate bowl, combine slightly beaten eggs, sour cream, milk, vanilla and melted butter.
- add dry ingredients and stir only until well mixed.
- fold in cream cheese cubes
- gently fold in blueberries.
- spoon into prepared pan
- in a separate bowl mix the topping ingredients
- spread topping evenly over the batter
- bake for 35 to 40 minutes or until a toothpick comes out clean

Wednesday, October 23, 2013

Cranberry Walnut Scones

One of the big selling points for moving to my new town was the proximity to a Wegmans.  For those of you who aren't aware of this magical place, it is a super market that has a café, lots of prepared foods, a wonderful natural food section, amazing store brand items, and a toy train that runs above part of the store.  The one near me (and hopefully all other locations) has a great kosher selection, including a kosher counter in the area where they have the deli, bakery, seafood, etc.

Another reason I love Wegmans is the events!  From family movie nights to book signings, they cater to all audiences.  Which brings me to why I'm telling you about my supermarket...

Last week they had a book signing for chef Anne Burrell's new cookbook "Own Your Kitchen".  It happened to fall on the day I planned to do my food shopping, so that afternoon I packed up my son and off I went.  Anne is every bit a crazy/funny as she appears on TV.  After telling her that my husband would be jealous that our infant son was meeting her and he wasn't she replied "oh, I'm sorry...wait, no I'm not".  She called my baby her "littlest fan".  I knew I was right to start him young on his love for cooking!


When I got home and broke open the book, my eyes immediately fell to the Brunch section where the first recipe was for cranberry walnut scones; which was perfect since this month's What's Baking theme was scones!  So I set out to make them on a day when we were having company over (no need for my husband and me to eat all 8 scones ourselves).

The scones were simple to make, even if I second guessed myself on if the consistency of the dough was actually correct (they came out exactly as they should, so I guess it was right).  The one thing that I found to not work from the original recipe was the cook time.  After the suggested "16 to 18 minutes" the scones were definitely not done.  I happened to be in my kitchen with a friend who was a professional baker who mentioned that her scones usually take 30-40 minutes to bake.  I kept mine in for another 10 minutes and they came out perfect.

For the honey butter that goes with the scones, I decided to be ambitious (and work on my arm muscles a bit) and I whipped it by hand.  It took longer than I remembered whipping cream to take, but we were all standing around the kitchen drinking coffee while I was whipping so I didn't mind.  Have I mentioned how happy I am to have a kitchen big enough for people to stand around in?  So much better than my old tiny one where I would be running in and out of the room to join in the conversation happening in the living room/dining room.  Of course the next day I remembered that my immersion blender has a whisk attachment...oh well..next time!

This recipe was one that I actually felt I made in the allotted amount of time.  From start to finish it really didn't take more than an hour, even with my adding the extra cook time.  And the consensus of all my guests was that the scones came out delicious.  And after eating one I wish we had more than 2 left over....


Cranberry Walnut Scones (very slightly adapted from Own Your Kitchen by Anne Burrell)
 
Ingredients:
3 cups all-purpose flour (plus more for dusting)
1 cup granulated sugar
2 tbsps baking powder
zest of 1 orange
pinch of kosher salt
1 1/2 sticks (12 tbsps) cold unsalted butter, cut into pea-size pieces
3/4 cup heavy cream
1 cup dried cranberries
1/2 cup chopped walnuts
turbinado sugar (Sugar in the Raw)
 
Directions:
- Preheat the oven to 375 and line a baking sheet with parchment paper
- Place the flour, granulated sugar, baking powder, orange zest, and salt in the bowl of a food processor and pulse to combine.
- Add the butter and pulse until the mixture looks like crumbled parmesan cheese (20 to 30 seconds).
- Add the cream and continue pulsing until the mixture begins to come together in little balls about the size of gravel, being careful not to overwork the dough or it will become tough.
- Turn the mixture onto a lightly floured work surface.  Add the cranberries and walnuts and gently work them into the dough.  Don't knead the dough - just bring it together until it forms a homogenous mixture, be gentle, but firm.
- Flatten the dough into a round disk about 1 inch thick.  Cut the disk (pizza style) into eight triangles.
- Place the dough triangles onto the prepared baking sheet and sprinkle with a little turbinado sugar.
- Bake for 25-30 minutes, or until golden on top.
 
Honey Butter
 
Ingredients:
1 1/2 cups cold heavy cream
1/4 cup honey
 
Directions:
- chill a metal mixing bowl in the freezer for 15-20 minutes (you can use your electric mixer bowl or, if you are whipping by hand, any metal mixing bowl).
- pour the cold heavy cream and honey into the bowl and beat until the cream begins to clump together (10 or so minutes).  Use right away or store in the fridge.

Monday, April 1, 2013

Matzah Meal Pancakes

Every year during Passover I try to not stock up on boxes of the mixes you can buy to make pretty much anything.  I like making things from scratch, if possible.  So I turned to a packet of family recipes that I was given at my bridal shower.  My aunt had given this packet to my cousin (her niece)at her bridal shower back in the 90's, so when my shower came around the cousin made sure to pass it along to me.  Of course, to give proper credit I have to remind myself who these were originally typed up for ("Mom" is actually Aunty Barbara and "Uncle Steve" is really my dad).  Though I also have insider info of knowing that this recipe for matzah meal pancakes, which is credited to my dad is actually a recipe from his mother (different sides of the family, so my cousin wouldn't know who my grandma is necessarily).

I grew up eating these pancakes, though I had forgotten all about them until I saw this recipe and asked my dad to clarify something.  When he mentioned what he puts on his pancakes (a sprinkle of sugar) memories of eating them as a child came rushing back to me.  This was my first attempt at making them and they ended up coming out pretty good!  They're not quite as fluffy as non-Passover pancakes, but they're not too dense, and they don't taste as fake as the stuff from the box.

My only complaint is that it only made 9 pancakes, so after my husband and I split a batch we were still a bit hungry.  But I definitely plan on making these again next year.  With a little maple syrup on them...delicious!


Matzah Meal Pancakes  (my grandmother's recipe)

Ingredients
3 eggs, separated
1/2 tsp salt
1/2 cup matah meal
1/2 cup water

Directions
- mix yolks gently in small bowl
- in a medium bowl, beat egg whites until "fluffy" (they should be bubbly and forming soft peaks, not hard like a meringue)
- in a small bowl mix matzah meal, salt, and water.
- mix matzah meal mixture into the yolks.
- fold into the egg whites.
- fry on greased skillet or griddle.

Monday, February 11, 2013

Popovers

For my office holiday gift swap I got a whole bunch of goodies, including a popover pan.  To be quite honest, I don't think I had actually had a popover before, but I always wanted to try making them.  And in one of my favorite movies My Blue Heaven there's a funny scene where Steve Martin (as a mobster sent to the burbs as part of the witness protection agency) is out with friends and grabs something from the bread basket.  He asks "What the frig is this?" and his answer comes from William Hickey (in a voice only he can do) saying "it's a pahpovah".  My description of this scene doesn't nearly do justice to the hilarity of this film.  If you haven't seen it, you should - it's classic Steve Martin, Rick Moranis, and Joan Cusack.


What I like about popovers is that you don't have to decide in advance to make them, like with cinnamon rolls or other baked breakfast treats.  They take less than an hour to make (30min of which is cooking time).  And there isn't a ton of clean-up after (a bowl, the pan, utensils, not much else).  It's a nice treat to enjoy on a weekend morning with your coffee.

The first time I made them, I just kept them plain, but the next time I added a cinnamon-sugar mix to the top to give it a little something extra.  One thing to note - the original recipe says that it makes 12 popovers, so I halved it since my pan makes 6.  It turns out, I must have a jumbo pan or something because when I halved the recipe I only ended up with 3!  The next time I made the whole recipe and came away with 6 yummy popovers.


Popovers (recipe by Mark Bittman)

Ingredients
1 tbsp melted butter
2 eggs
1 cup milk
1 tsp sugar
1/2 tsp salt
1 cup all-purpose flour

Directions   

- Heat the oven to 425.  Grease a 12-cup muffin tin or a popover tin and put it in the oven while you make the batter.
- Beat together the eggs, milk, butter, sugar, and salt.  Beat in the flour a little bit at a time; the mixture should be smooth.  Fill the tins at least halfway (if you have a large tin, this might make less than 12 popovers).
- Bake for 15 minutes, then reduce the heat to 350 and continue baking for 15 minutes more, or until the popovers are puffed and browned (do not check the popovers until they have baked for a total of 30 min).  Remove from the pan immediately and serve hot.


***My addition - to top them with cinnamon-sugar, let the popovers cool slightly, brush the tops with melted butter and then sprinkle them with pre-made cinnamon-sugar, or in a shallow dish, combine 2 tbsp cinnamon and 1/4 cup sugar until well mixed and roll the tops of the popovers in the mix.

Friday, October 5, 2012

French Toast Casserole

This month's Recipe Swap theme was Breakfast.  I was very excited about this, because during the week breakfast in our home usually consists of cereal or oatmeal (in the colder months) and on weekends it's nice to have something a little more special.

My assignment was French Toast Casserole, submitted by Coleen at Does Not Cook Well With Others.  It's similar to a dish my father makes that I've been dying to try, but swap rules say that you have to make the recipe given, not just something inspired by it, so my dad's recipe will be a post for another day.  I know how much I like that French toast, so I was excited to try this one out!

The recipe is simple to follow.  The only thing to take note of is that this needs to set for at least 8 hours in the fridge and then come back up to room temperature before cooking for 50 min, so you need to prep it the night before and take it out of the fridge almost 2 hours before meal time.  This is a meal you definitely have to plan ahead for.

I copied the recipe below from the recipe given me, but I did end up using some slightly different ingredients.  The recipe calls for Pepperidge Farm Hearty White bread (according to reviews on the original recipe post on Cooking Light, that's the bread that holds up best after soaking up the custard).  Well, I wasn't going to a big grocery store that week.  I ended up at a country food market that's known for its baked goods, so I bought a loaf of their country white bread and used that.  They also didn't sell reduced fat cream cheese, so I bought the full fat kind (it's not like I was eating this entire thing in one sitting, right??).

I think it still came out great.  Of course, there were only two of us eating it, so I ended up having it not only for breakfast on Sunday, but also Monday and Tuesday and still had about half of the pan left.  I think this is the kind of dish you only make if you have plenty of people to help eat it!


French Toast Casserole (given to me by Does Not Cook Well With Others

Ingredients 
16 slices Pepperidge Farm Hearty White bread, sliced into 1-inch cubes 
Cooking spray 
8 ounces ⅓-less-fat cream cheese at room temperature 
8 large eggs 
1 ½ cups reduced fat (2%) milk 
⅔ cup half-and-half 
½ cup real maple syrup (not pancake syrup) 
½ teaspoon vanilla extract


Directions
 

Spray a 9x13 baking dish with cooking spray. Spread the cubes evenly in the dish.  
Beat the cream cheese until smooth (about 3 minutes). Add the eggs, one at a time, mixing well and scraping down the bowl after each addition. Add in the milk, half-and-half, maple syrup and vanilla and mix until incorporated.  
Pour the custard over the bread cubes. Cover the dish and refrigerate 8 to 12 hours.  
When ready to serve, remove baking dish from refrigerator and let come to room temperature on the counter (about 30 minutes).   Preheat the oven to 375 degrees.
Bake for 50 minutes or until custard is set. Serve warm or room temperature.
Sift powdered sugar over casserole just before serving, and serve with additional maple syrup.

Wednesday, September 5, 2012

Multigrain Pancakes

My husband and I are runners.  He's run a couple of marathons and I have become an avid half-marathoner.  One of our favorite magazines is Runner's World.  Not only does it have great, inspiring articles about running, but it also has recipes each month for different meal ideas that are beneficial for runners.  After I made the devil's food cupcakes last week, I had some buttermilk left over.  My husband was reading the latest RW issue and spotted a recipe by Pam Anderson for "Multigrain Medallions" (aka buttermilk pancakes).  Always looking to cut out pre-made/processed foods, I decided to give this a try.

It was so easy.  We had everything we needed in our fridge or panty already, so I didn't even need to do any shopping!  We make pancakes every few weeks for a weekend breakfast or even a simple dinner, so we very much looked forward to seeing how this would turn out.  The steps were incredibly simple and easy to follow.

When making pancakes, I like to use my trusty electric skillet, so that you know it's cooking evenly (our stovetop always seems to be a bit slanted or the pan is much larger than the burner and it's hard to get things to cook 100% evenly).  It worked perfectly for this.

In the magazine, she gives the basic recipe then has 10 other variations which are supposed to promote different healthy side effects (one is a "muscle motivator" with dates and raisins, another has guacamole to help regulate blood sugar).  We opted to make the basic recipe and then added a few of our favorite toppings, like chocolate chips and blueberries.  Top with real maple sugar from Vermont, and I think we have a new way to make pancakes.  Sorry, Aunt Jemima!


Pam Anderson's Multigrain Medallions (originally published in Runners World magazine, October 2012)

Ingredients
1 cup white flour
1/3 cup each: cornmeal, whole-wheat flour, and old fashioned rolled oats
4 tsp sugar
1 tsp salt
1 tsp baking powder
1 tsp baking soda
1 1/2 cup low-fat buttermilk
1/2 cup low-fat milk (or water)
2 large eggs
2 tbsp vegetable oil, plus extra for brushing the griddle
1 tsp vanilla


Directions
- Heat a large nonstick-skillet or griddle over low heat.
- Mix flour, whole grains, sugar, salt, baking powder, and baking soda in a bowl.  (NOTE: white flour is included to provide fluffiness. If you don't have all three whole grains, pick one and use the following ratios: 1:2 whole wheat to white; 1:1 oats/cornmeal to white)
- Microwave buttermilk and milk for 30 seconds in a 2-cup measuring cup.
- Whisk in eggs, oil, and vanilla.
- Pour wet ingredients into dry; whist until just mixed.
- Return batter to measuring cup.
- Increase heat to medium and brush skillet with oil.
- When oil starts to spider, pour batter 1/4 cup at a time.
- When pancake bottoms are golden brown and tops start to bubble, after about 2-3 minutes, flip pancakes; cook until golden brown on other side.
- Repeat, brushing skillet or griddle with oil.
- Serve hot.

Sunday, July 29, 2012

Banana-Fig Bread

For this month's What's Baking challenge we were charged with baking with summer fruits.  July kind of got away from me, and as I've been running around enjoying my summer I didn't realize that I was nearing our deadline.  A few weeks ago I was on a business trip and picked up People magazine (my usual guilty pleasure for travel).  On the last page they had a recipe from Ted Allen for banana-fig bread.  I ripped it out, figuring it was something to add to my pile of recipes I'd get around to making one day, although my husband saw it and started asking me almost daily when I was going to make it.  Then as I started doing research earlier this week into what fruits are in season I noticed that figs were on the list.  Much to my husband's delight, I realized that this recipe fit the bill perfectly!

This ended up being a way to spend today's rainy afternoon.  It takes almost an hour of baking time, so it's great for a day when you have to hang around the house anyway.  And, ironically, we ate it while watching tonight's Chopped.

I'm excited for next month's What's Baking when I get to play host!!


Ted Allen's Banana-Fig Bread (originally published in People magazine, July 23, 2012)

Ingredients

1 cup chopped walnuts
1 1/3 cups all purpose flour
2/3 cup whole-what pastry flour
1/2 cup sugar
1/2 cup firmly packed light brown sugar
1 tsp baking soda
1/2 tsp salt
3 large ripe bananas, mashed
1 1/2 cups dried figs, stemmed and diced
6 tbsp unsalted butter, melted
1/3 cup plain yogurt
2 large eggs
2 tsp vanilla

Directions

- Preheat the oven to 350

- Bake walnuts 5 to 10 minutes or until golden, stirring after 4 minutes; set aside

- Whisk flours and next 4 ingredients in a large bowl; set aside.  Combine bananas and next 5 ingredients in a medium bowl; stir in walnuts.

- Fold banana mixture into flour mixture.  Spoon batter into a buttered and floured 9x5 in loaf pan.  Bake 55 minutes or until a wooden pick comes out clean, shielding with foil if necessary.  Cool bread in pan on a wire rack 30 minutes.  Remove from pan, cool completely.

Tuesday, June 19, 2012

Panera's Spinach Artichoke Souffle

During the week, breakfast at our home consists of a bowl of cereal or maybe a yogurt, so when the weekend rolls around we try to get a little fancier, making omelets, pancakes, etc.  A few weeks back, we were running errands and stopped in for brunch at Panera Bread.  Not wanting a breakfast sandwich or bagel, the spinach artichoke souffle caught my eye.  It was so delicious that I almost didn't want to give my husband a taste (but, alas, I did, as I could not deny him the yumminess of it).  Last week, on a whim I decided to turn to trusty old Google to see what I could find that was similar, and I came across this article where, back in 2008 Good Morning America did a segment on Top Secret Recipes Revealed!

Now, this isn't the usual fluffy OMG-is-it-going-to-collapse type of souffle, this is a totally cheating method using Pillsbury crescent roll dough to encase the whole thing.  I have to tell you, this was so simple to make and came out tasting absolutely delicious!  Although there's only two of us, I made the full recipe for 4, we stuck the other two in the fridge and ate them for breakfast two days later.  Still tasted just as good as right out of the oven!  The one thing I adjusted was that we had a bag of shredded Mexican blend cheese, so instead of 1/4 cup of cheddar and 1/4 cup Monterey Jack, I just did 1/2 cup of Mexican blend.

I would definitely make this again.  Especially if we were having overnight guests or just friends/family over for breakfast.  Serve with a side of fruit, and you got yourself a whole meal right there!

Panera Bread's Spinach Artichoke Baked Egg Souffle (as published by Good Morning America in 2008)


Ingredients
3 tablespoons frozen spinach, thawed
3 tablespoons minced artichoke hearts
2 teaspoons minced onion
1 teaspoon minced red bell pepper
5 eggs
2 tablespoons milk
2 tablespoons heavy cream
¼ cup shredded cheddar cheese
¼ cup shredded Monterey Jack cheese
1 tablespoon shredded Parmesan cheese
¼ teaspoon salt
1 8-ounce tube Pillsbury Crescent butter flake dough
melted butter
¼ cup shredded Asiago cheese

Directions
- Preheat oven to 375 degrees F.
- Combine spinach, artichoke hearts, onion, and red bell pepper in a small bowl. Add 2 tablespoons of water, cover bowl with plastic wrap and poke a few holes in the plastic. Microwave on high for 3 minutes.
- Beat 4 eggs. Mix in milk, cream, cheddar cheese, Jack cheese, Parmesan, and salt. Stir in spinach, artichoke, onion, and bell pepper.
- Microwave egg mixture for 30 seconds on high, and then stir it. Do this 4 to 5 more times or until you have a very runny scrambled egg mixture. This process will tighten up the eggs enough so that the dough won't sink into the eggs when it's folded over.
- Unroll and separate the crescent dough into four rectangles. In other words, don't tear the dough along the perforations that make triangles. Instead, pinch the dough together along those diagonal perforations so that you have four rectangles. Use some flour on the dough and roll across the width of the rectangle with a rolling pin so that each piece of dough stretches out into a square that is approximately 6 inches by 6 inches.
- Brush melted butter inside four 4-inch baking dishes or ramekins. Line each ramekin with the dough, then spoon equal amounts of egg mixture into each ramekin. Sprinkle 1 tablespoon of asiago cheese on top of the egg mixture in each ramekin, and then gently fold the dough over the mixture.
- Beat the last egg in a small bowl, then brush beaten egg over the top of the dough in each ramekin.
- Bake for 25 to 30 minutes or until dough is brown. Remove from oven and cool for 5 minutes, then carefully remove the soufflés from each ramekin and serve hot.