Showing posts with label Passover. Show all posts

Friday, April 10, 2015

Fried Chicken Strips

Every year for Chanukah my grandmother makes fried chicken which she serves along with biscuits, latkes, and applesauce.  She coats her chicken in matzah meal before frying and it comes out crispy and delicious.  So when I was looking through my copy of A Treasury of Jewish Holiday Baking and came to the chapter called "A Baker Becomes a Cook", I wasn't surprised to see a recipe for chicken cutlets in the Passover section.


This can be a good lunch or dinner and should appeal to the whole family.  I would use this same recipe throughout the year (most likely only adjusting the oil I use for frying and maybe using flour instead of the potato starch if we didn't have any more on hand).


Fried Chicken Strips (slightly adapted from A Treasury of Jewish Holiday Baking)

Ingredients
4 skinless, boneless chicken breasts
3/4 cup potato starch
2 1/2 cups matzah meal
1 tbsp salt
1 tsp ground black pepper
1 tbsp garlic powder
1 tbsp onion powder
4 eggs
oil for frying (cottonseed oil during Passover, canola oil the rest of the year)

Directions
- Using kitchen shears, cut the chicken into 1 inch thick strips.
- In a large skillet, pour in enough oil to come about half an inch up the side of the pan and heat until approx 350 degrees F.
- Into a shallow bowl or dish with high sides (I use deep paper plates), pour the potato starch.
- In a second shallow bowl, crack the eggs and lightly beat them.
- In a third shallow bowl, mix together the matzah meal, salt, pepper, garlic powder, and onion powder.
-  Set your plates in an assembly line - potato starch, egg, then matzah meal closest to the skillet.  Take a chicken strip and dredge in the potato starch, shaking off the excess.  Dip the strip in the beaten egg next, letting the excess drip off.  Last, press the strip into the matzah meal until fully coated.  Place the strip in the heated oil.
- Working in batches, heat the strips until golden brown, turning once.
- Place the cooked chicken on paper towels to drain.
- Serve warm or cold with any dipping sauce you desire (or no sauce at all!)

Thursday, April 9, 2015

Roasted Lemon-Pepper Tilapia

I use my copy of Kosher by Design Short on Time frequently, so when I saw that the author also had a Passover cookbook, I made sure to buy it ahead of this holiday.  While several recipes are a tailored specifically for Passover, many are just favorites from her other books that happen to be Kosher for Passover.  One of those recipes that caught my eye was the one for roasted lemon-pepper cod.  I added it to the menu plan for this week and I have to say, it did not disappoint!  Even my cream-sauce hating husband liked it!

 
I made a few adjustments to make it work better for my family (including switching the fish out for tilapia due to the size of the filets available at my market) and will be sure to make this again in the future.  I ended up with a lot of leftover sauce (I changed the measurements in the recipe below so you shouldn't have this issue) and I'll say, this sauce was also delicious when eaten with my leftover gnocchi.


Roasted Lemon-Pepper Tilapia (slightly adapted from Passover by Design)

Ingredients
four 6oz filets of tilapia, cod, or halibut
1 large lemon
coarsely ground black pepper
1 1/2 cup heavy cream
1 tsp onion powder
scant 1/4 cup reduced fat sour cream

Directions
- Preheat oven to 375 degrees F
- Line a jellyroll pan with parchment paper
- Season both sides of fish with salt, then place them on the prepared pan
- Using a microplane, zest the lemon over the fish, reserving the lemon.  Sprinkle with pepper.
- Roast for 20 min.
- While fish is cooking, heat the heavy cream in a medium saucepan over medium heat, until it starts to form bubbles around the edges.
- Reduce heat to medium-low, then add the juice from the lemon and onion powder.  Simmer on low heat for 7-10 minutes to reduce until slightly thickened.
- Remove the saucepan from the heat and whisk in the sour cream.
- Transfer fish to plates or serving platter, spoon the sauce over the fish (or spoon the sauce onto the plate, place the fish on top, then drizzle more sauce over the fish).

Wednesday, April 8, 2015

Quinoa with Roasted Garlic, Tomatoes, and Spinach

Did you know that quinoa is Kosher for Passover?  Well, it is!  This was a welcome fact as I set about menu planning.  Aside from veggies there aren't many other sides that don't involve some sort of matzah/matzah meal/etc so quinoa is a nice break from that.

Last summer I decided to add more quinoa to our diet and started looking for good recipes.  I came upon this one on MyRecipes.com in my search and it wasn't until the second or third time I made it that I noticed the author was Mary Ellen from Mary Ellen's Cooking Creations, a friend of mine from an online community.  I made a few small adjustments (most importantly was making it a parve side) and have made it several times since.  Quinoa is considered a "superfood" because of its health benefits so I should probably make it more often than I do.

The red pepper flakes add a nice kick to it, though I think if you don't want the heat (or if you have a little mouth to feed that doesn't like too much spice) it could be left out and would still make a delicious dish.


Quinoa with Roasted Garlic, Tomatoes, and Spinach (slightly adapted from Mary Ellen's Cooking Creations)

Ingredients
1 bulb of garlic
1 tbsp olive oil, plus a drizzle more
small shallot, chopped
1/4 tsp red pepper flakes (leave out if you don't want the heat)
1/2 cup uncooked quinoa
1 tbsp dry white wine
1 cup low sodium vegetable stock
1/2 cup spinach, sliced into thin strips
6-10 cherry tomatoes, halved

Directions
- Preheat oven to 350 degrees F
- Cut the top off of the bulb of garlic, exposing the cloves.  Place bulb on foil, drizzle with olive oil, then wrap the foil around the bulb, making a little pouch.
- Put the foil pouch in the oven and roast for 1 hour.  Set aside to cool (opening the packet after approx 5 min).
- As the garlic cools, heat 1 tbsp of olive oil in a saucepan over medium heat.
- Add shallots and red pepper flakes, stir and cool 1 minute.
- Add quinoa and cook 2 minutes, stirring constantly.
- Add wine and stir constantly until the liquid is absorbed.
- Stir in broth.  Bring to a boil, cover, reduce heat and simmer for 15-20 minutes, until liquid is absorbed.
- Remove from heat.
- Squeeze the pulp from the roasted garlic into the quinoa, discarding the skins.
- Add the tomatoes and spinach to the quinoa and stir.
- Serve immediately.

Tuesday, April 7, 2015

Potato Spinach Gnocchi with Tomato Sauce

When coming up with my menu plan for the week of Passover, I knew I could rely on many of our dishes we have throughout the year, but I wanted to be a little more adventurous and make things that needed modification to be eaten during this time.  Jewish Federation sends out a newspaper and this issue included an article with recipes for a vegetarian seder.  A few of these dishes jumped out at me so I was excited to add them to the week's lineup.

I was having dinner guests over on Sunday so I set out to try my new-found recipe.  This potato spinach gnocchi was pretty easy to make, though the rolling the dumpling part was a bit tedious.  Everyone enjoyed it and went back for seconds, so I think it was a hit!

This recipe made about 100 tater tot sized dumplings so this can definitely feed a crowd.  I made the tomato sauce included in the article, but you could serve this with any store bought or homemade sauce.  The gnocchi are finished off with a sprinkle of parmesan and baked in the oven which I think adds a nice flavor and makes the texture a little less mushy.  The dumplings stuck a bit to the baking sheet, but I plated the dumplings that side down so it still looked flawless (and gave my husband the opportunity to eat the leftover bits off the foil after our guests had left!).  I saved the leftovers and am hoping it reheats well.  I'll update once we eat the rest!


Potato Spinach Gnocchi (adapted from recipe by Marshall Weiss published in NJJN)

Ingredients
2lbs baking potatoes (which was 4 potatoes for me)
1 cup potato starch plus more as needed
1 egg, lightly beaten
2 tsp salt
10oz frozen chopped spinach, thawed
1 cup ricotta chese
1/2 tsp nutmeg
1/4 cup grated parmesan cheese

Directions
- Peel potatoes and boil in water for 15-30 min, until easily stabbed through with a fork.
- Preheat oven to 375 degrees F.  Prepare a baking sheet by lightly oiling it (during Passover use cottonseed oil or Kosher for Passover olive oil).
- In a medium bowl, mash potatoes.  Mix potato starch, egg, salt, spinach, ricotta, and nutmeg.  If the dough is too sticky, add additional potato starch.
- Bring 4 qts of water to a boil.
- While water is heating, make the dumplings.  With wet hands, form 1/2 tbsp of dough into a tater tot shape.
- Once the water is boiling, carefully drop the gnocchi into the water (one at a time so you don't splash boiling hot water onto yourself).  They will rise to the surface when cooked, which only takes a few minutes.
- As the gnocchi rise to the top, remove them from the pot using a slotted spoon and place it onto the prepared baking sheet.
- Sprinkle the gnocchi with the grated parmesean and bake for 10-15 minutes.


Tomato Sauce for the Gnocchi

Ingredients
2 tbsp Kosher for Passover olive oil (or cottonseed oil)
1 small onion, chopped
3 cloves garlic, minced
1/4 cup parsley, chopped
1 bay leaf
28oz can crushed tomatoes
1 small can tomato paste

Directions
- Heat the oil in a medium pot.  Add the onion and garlic and cook on low heat until translucent (approx 5 minutes)
- Add parsley, bay leaf, tomatoes, and tomato paste.
- Bring to a boil, then reduce heat and simmer for 20-30 minutes.

Monday, April 6, 2015

Passover Apple Cake

I hate to show up to my grandmother's house for a seder empty handed.  I knew I was bringing gefitle fish to my in-laws the next night but that's my grandmother's specialty so I had to come up with another idea.  Dessert is usually my go-to but during Passover you have to be careful what you make since many options come out dry or tasteless.  In an effort to try new things this year, I turned to my copy of Arthur Schwartz's Jewish Home Cooking.


In this book there is a gorgeous photo of a slice of apple cake.  It looks nice and cakey and delicious. Plus it was parve, which is always a good thing.  So I set out to recreate that cake.  Following his recipe I didn't exactly get the cake in the picture, but what I did end up with was absolutely delicious!  I adjusted the recipe a bit as I went since the original called for 5 apples, sliced.  I put half this amount in the middle of the cake then went to put the other half on top.  After getting 2 layers of apple slices and still having one and a half apples left (plus the batter didn't cover the first apple section) I realized this was just way too much.  I think that my adjustment will help get a better ratio of apple to cake.

The cake was incredibly moist and delicious.  Most of it was finished at the seder, and the leftovers that we divided up amongst a few of us didn't last long.  I'll be sure to make this again next year!


Passover Apple Cake (slightly adapted from Arther Schwartz's Jewish Home Cooking)

Ingredients
Topping:
1/2 cup chopped walnuts
3/4 cup granulated sugar
2 tsp ground cinnamon
1 tsp ground nutmeg

Cake:
3 large eggs
3/4 cup granulated sugar
1/3 cup vegetable oil (cottonseed oil during Passover)
3/4 cup cake meal
3 medium apples, peeled, cored and cut into 1/4 in slices (preferably Golden Delicious apples)
1/3 cup raisins (optional)

Directions
- Position an oven rack in the center of the oven.  Preheat the oven to 350 degrees F.
- Lightly oil an 8 inch square glass baking dish.
- In a small bowl, mix together the topping ingredients and set aside.
- In a medium bowl, with an handheld mixer, beat the eggs on medium speed until well mixed.
- Beat in the sugar 2tbsp at a time, beating until the mixture is thick and foamy.
- Beat in the oil, adding it in a steady stream.
- Scrape down the sides of the bowl with a rubber spatula, then using the spatula stir in the cake meal, blending well.
- Pour half of the batter into the prepared pan.  Sprinkle half of the topping over the batter.  Top with half of the apple slices and all of the raisins (if using).
- Scrape the remaining batter over the apples, spreading it out to cover the apples evenly.  Arrange the remaining apple slices on top of the batter.  Sprinkle the remaining topping mixture over the apples.
- Bake for 1 hour 15min, until the topping has begun to carmelize.
- Let the cake cool in the baking dish for several hours before slicing and serving.

Tuesday, February 10, 2015

Hash Brown Quiche

I've said it before and I'll say it again - I love brunch.  I want to invite people over at least once a month so I can enjoy the decadent dishes I can get away with making.  In addition to my french toast, my go-to brunch dish is this hash brown quiche.  It combines eggs and potatoes in one delicious bite.  And (bonus!) after you pre-cook the hash brown crust, you bake the eggs at the same temperature as the french toast.  I pop it in the oven 15 minutes after the french toast goes in, then I even have time for the quick clean up before my guests arrive!


I have mixed it up a little as well since I started making this.  I've added mushrooms, switched out different kinds of cheese, etc.  So you can add your own personal twist to cater to your family's tastebuds.

This dish is also toddler approved (though you may have to tell them it's "cheese" or else they won't eat it).

Hash Brown Quiche (slightly adapted from Paula Deen)

Ingredients
3 cups shredded hash brown (either freshly shredded potatoes or thawed from frozen)
4 tbsp (1/2 stick) melted butter
3 large eggs
1 cup half-and-half
1/4 cup diced scallions
1 cup shredded cheddar cheese
salt
pepper

Directions
- Preheat oven to 450 degrees, F
- In a colander, gently press potatoes with a paper towel to squeeze out excess water.
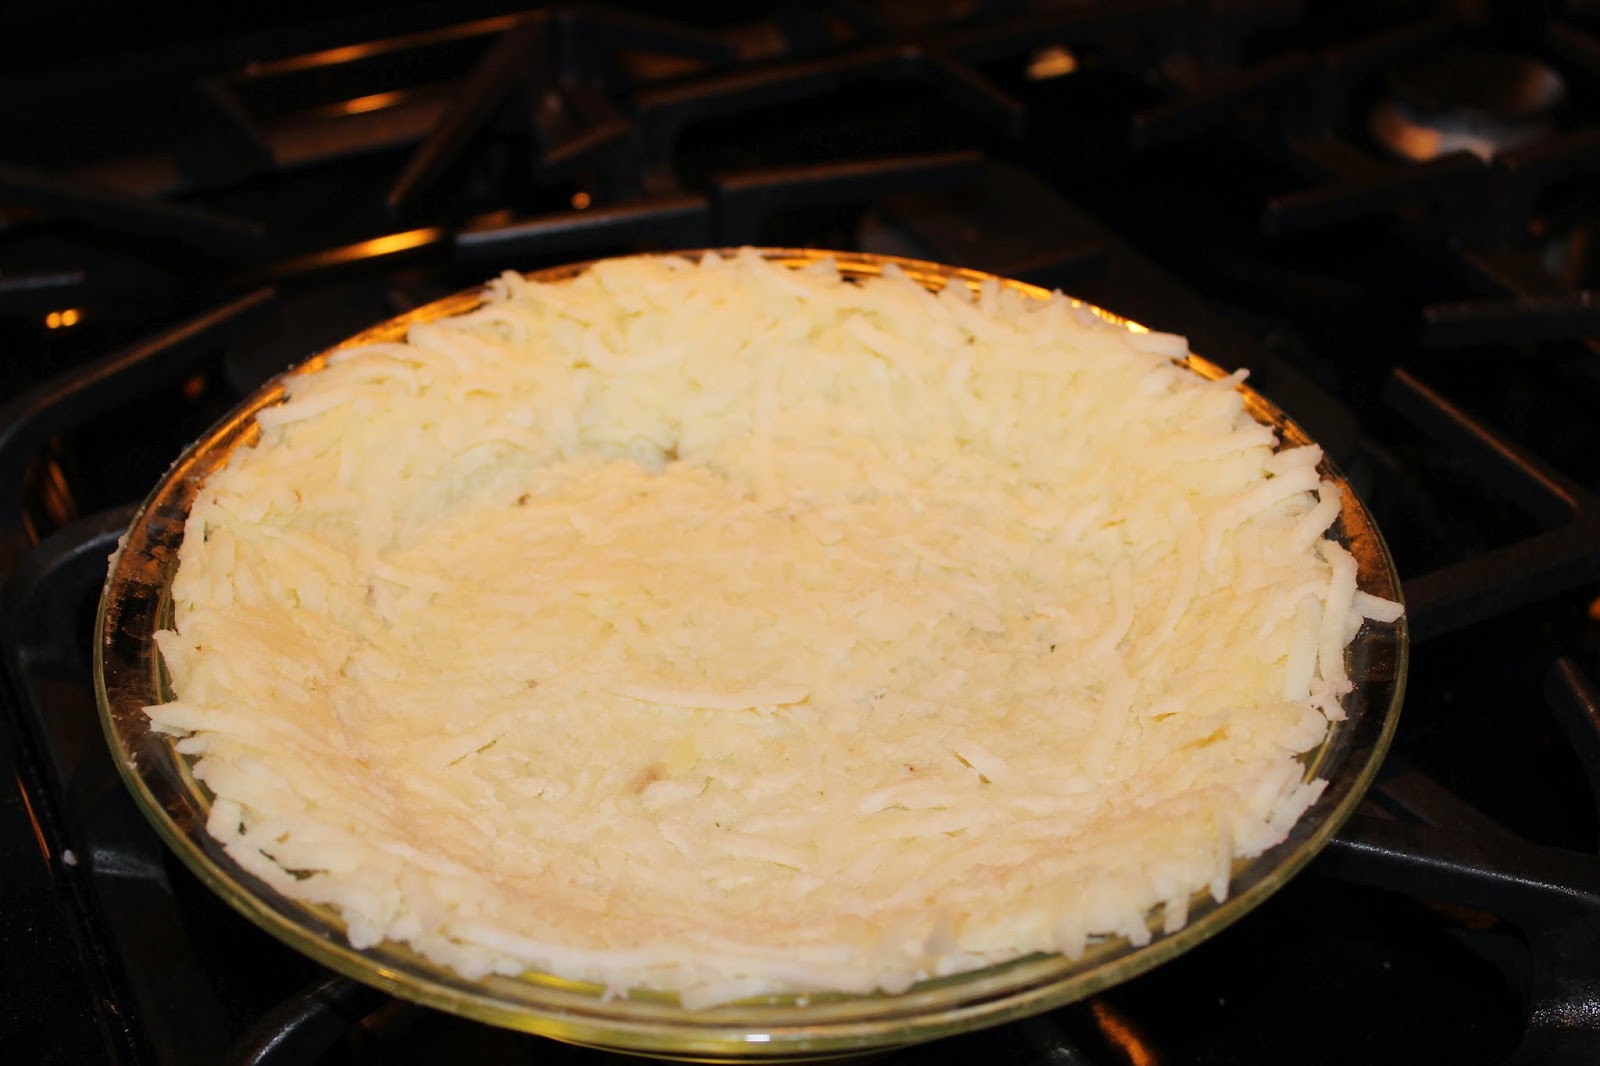
- In a greased 9in pie plate, toss potatoes with the melted butter until well combined.  Then press the potato into the bottom and sides of the plate to form the crust.
- Bake for 20-25 minutes until it starts to turn golden brown and starting to crisp.  When you remove it from the oven, lower the temperature to 350 degrees F.
- In a mixing bowl, whisk together the egg and half-and-half.  Then stir in the scallions, cheese, and salt and pepper to taste.
- Once the potato crust is out of the oven, pour the egg mixture into the center of the crust.  Use a spoon or spatula to spread out the cheese and scallions.
- Bake for 30-40 min (at 350) until the center is puffy and light golden brown.

hash brown crust, ready for the oven

Tuesday, April 22, 2014

Passover Chocolate Chip Cookies

Every Passover I like to make some treats to enjoy.  This  year I was, again, trying to avoid using boxed mixes.  This recipe for chocolate chip cookies caught my eye and I knew I wanted to try it.  I mean, who doesn't like chocolate chip cookies?!

In the end, the cookies were maybe a smidgen drier than I normally like, but they were in no way a "lesser" cookie that was obviously made for Passover.  I threw in some walnuts, as well, which I think added nicely to the flavor.  My husband and I really enjoyed these and I think they will make a return appearance in Passovers to come.


Passover Chocolate Chip Cookies (slightly adapted from The Treasury of Jewish Holiday Baking)

Ingredients
1 1/3 cups brown sugar
1/2 cup granulated sugar
1 tbsp. vanilla (must be kosher for Passover)
1 1/2 sticks unsalted butter
2 eggs
1/2 tsp salt
1 cup matzah cake meal
1 cup potato starch
2 cups chocolate chips
1 cup chopped walnuts


Directions
- In a large mixing bowl, cream the brown sugar, granulated sugar and vanilla with the butter.  Blend in the eggs.  Stir in the salt, matzah cake meal, and potato starch.  Fold in the chocolate chips and walnuts.
- Chill the dough for at least one hour.
- Preheat oven to 350.
- Line 2 baking sheets with parchment paper.
- Scoop generous tablespoonfuls of dough and place them on the baking sheet.  Press down to flatten the dough a bit.
- Bake for 15-18 minutes to desired crispness.

Monday, April 7, 2014

Passover Favorites

With Passover a week away I wanted to re-share some of my favorite dishes I have posted about in the past two years.  My eating habits on Passover have changed a lot since I was a child (I used to think that it had to come from the Passover aisle or from the catalog of candy I would sell for Hebrew school) and I now realize that most of what I make during the rest of the year can still be eaten during this time.  However, there are some things that I make specifically during Passover, usually using matzah meal or the Passover cake meal as a substitute for flour.  I can't wait to try new things this year!


Here are links to some of my favorite Passover dishes:

Veggie Kugel

Gefilte Fish

Fudge Brownies

Geshmearto Matzah

Matzah Meal Pancakes

Matzah Ball Soup


What are your favorite dishes to make?

Wednesday, November 6, 2013

Primavera Chicken

Now that we have the baby, I am always looking for recipes that take very little prep time but still look and taste like I slaved for hours in the kitchen.  Flipping through my Kosher By Design: Short on Time book the other day I came across this recipe that not only was a perfect fit for a delicious fall dinner, but also takes no time at all to prepare.

All you have to do is slice up the zucchini, squash, and tomatoes the dish is basically ready to go!  Of course it takes 2 hours to cook but as someone who is home for most of the day but doesn't have all afternoon to cook, this is something that can easily be done.  Once I go back to work I would only make this on a weekend when we're busy around the house but even if you get home before 5:30 you can still have dinner on the table by 7:30.  I halved the recipe, but I typed it up as is below in case you have more than 3 people to feed.  It's very easy to halve since the original recipe calls for it to be baked in two separate 9x13 pans.

I actually threw in a few more vegetables (butternut squash and red onion), though I roasted them separately just in case they didn't all work well together.  In the end I served the added veggies underneath the rest and thought the combination was great.

This chicken dish will definitely make its way into our dinner rotation.


Primavera Chicken (from Kosher By Design: Short on Time)

Ingredients
6-8 chicken legs, with bone and skin
6-8 chicken thighs, with bone and skin
1 yellow squash, unpeeled
1 green zucchini, unpeeled
1 qt cherry tomatoes, halved
1 8oz bottle of Italian dressing

Directions
- Preheat oven to 350 degrees.
- Place the chicken pieces in single layers, skin side up, into two 9x13 inch baking pans.
- Slice the squash and zucchini in half lengthwise and slice into 1 inch thick half-moons.  Scatter over the chicken.  Toss on the halved tomatoes.
- Shake the dressing and drizzle it over the chicken.
- Bake, uncovered, for 2 hours
- Remove the chicken to a platter.  Toss the vegetables in the pan liquid and then scatter them over the chicken.

Friday, October 4, 2013

Parsnip and Potato Soup

I am so happy that my son's schedule is starting to get a slight bit more predictable and I am able to cook dinner again!  Usually it ends up being a quick and easy meal that gets made as my husband is putting the baby to bed, and dinner time ends up being 9pm, but we get to eat a home cooked meal, so we're ok with that.

One of my go-to shows to watch during this maternity leave is The Rachael Ray Show (it happens to fall at a time that usually ends up as my son's morning meal time and it keeps me entertained).  While I enjoy watching the show in general, it's also a great place to get meal ideas!  Last week she made a parsnip and potato soup that looked so delicious that I knew I needed to make it as soon as possible.

The soup starts out with bacon, which (obviously) I can't use, so I substituted a little oil and added a little more salt than it would have taken if we used salty bacon.  I didn't feel there was anything missing flavor-wise with these substitutions.  Something else I did that wasn't in the original recipe is that while I blended the soup I left some chunks of potato and parsnip, which my husband agreed was a nice touch.  It added a little more texture to the soup (we always laugh when the judges on Chopped refer to texture in dishes, but it's a very valid point!).

This soup is a perfect dish for a fall evening.


Parsnip and Potato Soup (slightly adapted from Rachael Ray)

Ingredients
2 tbsp cooking oil (I used grape seed oil)
2 tbsp butter
2 large Russet potatoes, 1 1/4 lbs, peeled and diced 
3 to 4 large or 6 medium parsnips, peeled and chopped (3 cups)
1 onion, chopped 
4 cloves garlic, chopped 
Black pepper 
1/8 tsp grated or freshly grated nutmeg 
1 bundle of parsley, tied with string
1 qt Imagine No-Chicken stock or vegetable stock
1/2 pt cream 
Salt
Toasted pumpkin seeds to garnish
Sourdough rolls to serve 
Directions
- Heat a soup pot with the oil over medium-high heat. Add butter to melt.
- Reduce heat a bit, add potatoes and stir to coat.
- Add parsnips, onions, garlic, black pepper, nutmeg and parsley; partially cover and cook to soften 15-20 minutes, stirring occasionally. (The color of vegetables should be light golden.)
- Remove parsley.
- Purée potatoes and parsnips in batches if necessary in a food processor or blender with stock or just add stock to the soup pot and use an immersion blender, leaving some chunks.
- Stir in cream then season the soup with salt to taste.
- Serve in bowls, garnish with pumpkin seeds, with sourdough rolls on the side for dunking.

Monday, April 1, 2013

Matzah Meal Pancakes

Every year during Passover I try to not stock up on boxes of the mixes you can buy to make pretty much anything.  I like making things from scratch, if possible.  So I turned to a packet of family recipes that I was given at my bridal shower.  My aunt had given this packet to my cousin (her niece)at her bridal shower back in the 90's, so when my shower came around the cousin made sure to pass it along to me.  Of course, to give proper credit I have to remind myself who these were originally typed up for ("Mom" is actually Aunty Barbara and "Uncle Steve" is really my dad).  Though I also have insider info of knowing that this recipe for matzah meal pancakes, which is credited to my dad is actually a recipe from his mother (different sides of the family, so my cousin wouldn't know who my grandma is necessarily).

I grew up eating these pancakes, though I had forgotten all about them until I saw this recipe and asked my dad to clarify something.  When he mentioned what he puts on his pancakes (a sprinkle of sugar) memories of eating them as a child came rushing back to me.  This was my first attempt at making them and they ended up coming out pretty good!  They're not quite as fluffy as non-Passover pancakes, but they're not too dense, and they don't taste as fake as the stuff from the box.

My only complaint is that it only made 9 pancakes, so after my husband and I split a batch we were still a bit hungry.  But I definitely plan on making these again next year.  With a little maple syrup on them...delicious!


Matzah Meal Pancakes  (my grandmother's recipe)

Ingredients
3 eggs, separated
1/2 tsp salt
1/2 cup matah meal
1/2 cup water

Directions
- mix yolks gently in small bowl
- in a medium bowl, beat egg whites until "fluffy" (they should be bubbly and forming soft peaks, not hard like a meringue)
- in a small bowl mix matzah meal, salt, and water.
- mix matzah meal mixture into the yolks.
- fold into the egg whites.
- fry on greased skillet or griddle.

Thursday, March 28, 2013

Decadent Fudge Brownies with Glossy Fudge Frosting

It's Passover again!  I'm trying to expand my Passover repertoire this year (and not make so many things from boxed mixes), so I cracked open A Treasury of Jewish Holiday Baking which I had received as a Chanukah gift from my husband's aunt and uncle.  Many recipes looked delicious, but this one really stood out to me.  Brownies that were Kosher for Passover and tasted good???  What??!!  So I decided to give them a whirl.

Boy am I glad I did!  They really are decadent, and everything about them is delicious, down to the mocha frosting (the recipe says you can use either water or coffee, I highly recommend using the coffee!).  To be honest, these were some of the best brownies I've had, Passover or not.  I think I may even break this out at other points of the year!  Maybe I should stock up on Passover cake meal.....

And the best part?  This month's theme for What's Baking is "sprinkles", so these qualify for my submission there, too.  Though regular sprinkles have corn starch, so I used the sugar crystal type.


Decadent Fudge Brownies with Glossy Fudge Frosting


Ingredients

for the brownies:
2 cups white or brown sugar
1 cup (2 sticks) unsalted butter or unsalted Passover margarine, melted and cooled
3 eggs
1 tablespoon brewed coffee
3/4 cup unsweetened cocoa powder, sifted
1/4 tsp salt
1 scant cup matzah cake meal

for the frosting:
2/3 cup water or brewed coffee
7 oz semisweet chocolate, coarsely chopped
2 tbsp unsalted butter or Passover margarine, softened


Directions
- preheat the oven to 350 degrees.
- lightly grease a 7-by-10 inch rectangular baking pan, a 9-inch square pan, or an 8 or 9 inch springform pan.
- in a bowl, mix the sugar into the melted butter, then the eggs, coffee, cocoa, salt, and cake meal.
- spoon the batter into the prepared pan and bake for about 25 min.  Do not overbake.  The brownies should be set and seem dry to the touch, but there should not be a crust around the sides.
- Cool in the pan

For the frosting:
- heat the water or coffee in a small saucepan.
- as it comes to a boil, reduce the heat and stir in the chopped chocolate.
- remove the pan from the stove and stir until the chocolate is thoroughly melted.
- cool in the refrigerator for about 30 min.
- whisk in the softened butter or margarine and spread the frosting on top of the cooled brownies.
- let frosting set
- cut into squares (or wedges if using a round pan)

Tuesday, February 19, 2013

Flourless Raspberry Souffle

A few weeks ago my husband and I went down to Atlantic City to see a cooking demonstration by Geoffrey Zakarian.  It's no secret we're huge fans of Chopped, so if we have a chance to see a judge in person, we're there.  And another thing we don't usually pass up is a good excuse to go to Atlantic City!  The demonstration was a lot of fun.  Chef Zakarian showed us how to make a hamburger (apparently if you mash it too much and add things to the meat, it's a meatball, not a burger....who knew?!) with a side of coleslaw, plus a dessert of raspberry souffle.


Souffle is one of those things that I never attempted because I had heard how hard it was to make it, and all the superstitions about how easy it is to make the souffle fall (making loud noises, opening the oven, etc).  But the way he demonstrated it, he kept saying how easy it is, even showing that you can open the oven, let the souffle sit there before putting it in the oven, etc.  So, I decided to attempt making this dessert for Valentine's Day, and the results were a success!

The demonstration itself was a lot of fun.  For some reason Bobby Flay's mother was there and sitting a few rows ahead of me.  The audience could ask questions, so I asked him about the weird ingredients in the Chopped baskets (they had to eat lamb testicles...ick!).  One woman asked the best way to cut onions without crying (the answer?  "have your boyfriend do it") and there was also an older Italian woman there with her American daughter who asked questions, but then answered them herself like she was testing Chef Zakarian.  It was a lot of fun.

The souffle made a lovely dessert for a special dinner, and honestly was so easy and so yummy, I'm definitely going to make it again.  It's also a good dessert to make when you have folks over for dinner because it's sure to impress!


Flourless Raspberry Souffle (as printed in Geoffrey Zakarian's Town/Country)

Ingredients
for the puree:
4 6oz containers fresh raspberries
1/2 cup sugar
1 1/2 tbsp fresh lemon juice
for the souffles:
butter, for greasing the souffle dishes (**to make this parve, use vegetable shortening)
1 cup sugar
18 large egg whites
confectioners' sugar, for garnish


Directions
- Set aside 36 raspberries for garnish.  Place the remaining raspberries, 6 tbsp of the sugar, and the lemon juice in a saucepan over medium heat and cook until the fruit is very soft (15 to 20 min).  Remove the raspberries from the heat and allow them to cool to room temperature.  Puree the berries in a blender (or use an immersion blender, stirring, then transfer them to a bowl.  Cover the bowl with plastic wrap and refrigerate for at least 1 hour.
- Preheat the oven to 400 degrees.
- Prepare six 8oz ramekins (**though if you have a different size, it's ok to use what you have) by generously buttering them on the inside and then coating the butter lining with 2 tbsp of the sugar.  Place the egg whites in the bowl of an electric mixer with the whisk attachment on low speed.  Whip the whites until they form soft peaks, then gradually begin adding the remaining sugar.  Continue whipping until the egg whites form stiff, glossy peaks.
- Remove the egg whites from the mixer and gradually fold in 1 1/4 to 1 1/2 cups of raspberry puree in thirds, taking care to not over fold (if you like an airy, lighter-flavored souffle, add the lesser amount of the puree; if you prefer a more intense fruit flavor, add the greater amount).  Reserve any remaining puree.  Using a pastry bag with the large plain tip, pipe the souffle mixture into the ramekins, swirling it so each souffle has a peak like a soft ice cream cone.  (Alternatively, just spoon the mixture into the ramekins, filling them not quite to the top).  Stud the peaks of the souffles with the reserved raspberries.
- Place the souffles in the oven immediately and bake until puffed and golden, about 15 min.  The center of the souffle should still be soft.  Dust with confectioners' sugar and serve immediately, garnished with any leftover raspberry puree.

Friday, January 25, 2013

Sole with Thyme

My go-to white fish is usually flounder.  Whether it's making my poached flounder or just popping it in the oven with a little lemon juice and paprika.  But sometimes it's nice to change things up and try something new.  When we decided to have some friends over for dinner while their kitchen was under renovation, I flipped through The Silver Spoon and decided to try out this recipe for Sole with Thyme.

It's a very simple recipe and came out very tasty.  Though the one thing that I would change is that the recipe says "keep in a cool place until ready to serve".  We did, and ended up eating it at room temperature.  While it still tasted good, I think that it would have been a little better if it was warm.


Sole with Thyme (from The Silver Spoon)

Ingredients
4 sole, cleaned, trimmed, and skinned
1/2 - 2/3 cup olive oil, plus extra for drizzling
juice of 1/2 lemon, strained
3 tbsp fresh thyme leaves
salt
white pepper

Directions
- Place the fish in a large pan, add water to cover and a pinch of salt, and bring just to a boil, then lower the heat and poach until tender.  Drain and place on a serving dish.  Drizzle with olive oil and lemon juice.
- Put the thyme leaves, a pinch of salt, and a pinch of pepper in a bowl and gradually stir in the olive oil.
- Spoon the thyme sauce over the dish and keep in a cool place until ready to serve (***I personally think it would be better served warm)

Monday, January 14, 2013

Greek Garlic Chicken

I make chicken just about every week or two, and I'm always looking for new/different recipes to use so we don't feel like we're eating the same thing over and over.  I found this recipe in Kosher by Design: Short on Time.  I love kalamata olives, so I knew I wanted to try this one out.

It was pretty simple to make (though the whole "short on time" part didn't really apply to this recipe.  The "5 min prep time" took about 25 min, and that's before it cooks for an hour, but that's ok since I made this on a Sunday so I didn't have as much of a time constraint.  I made a few adjustments - the first being that the recipe in the book calls for 2 whole chickens, so I made half a batch (and actually only used leg quarters cut into thigh & drumsticks due to not being able to get to the better store to pick up a full chicken).  I mean, unless I had a family of 4 and wanted leftovers, there's no reason to make two whole chickens!

The chicken came out delicious.  My husband inhaled it and I know there's going to be a fight over the leftovers (only 2 pieces left!).


Greek Garlic Chicken (slightly adapted from Kosher By Design: Short on Time)

Ingredients
1 chicken, cut into eighths
1 onion, cut into large chunks
1 lemon
6-8 sprigs fresh oregano
5 cloves garlic, halved
salt
pepper
1/4 cup olive oil
1/2 cup white wine
3/4 cup kalamata olives, pitted and coarsely chopped
1/4 cup kalamata olives, whole for garnish

Directions
- Preheat the oven to 450 degrees.  Place the chicken pieces in a single layer, skin-side-up in a 9x13 baking dish.
- Add the onion chunks.  Slice the lemon in half lengthwise.  Squeeze the lemon halves over the chicken.  Cut each lemon half into 4 pieces, add to the chicken.
- Set aside 2 sprigs of oregano and strip the leaves from the rest.  Scatter the leaves and stripped sprigs over the chicken.  They will add their perfume to the dish. 
- Add the garlic and season with salt and pepper.  Drizzle with the oil and wine.  Toss the mixture together.  Sprinkle the chopped olives over the chicken.
- Bake, uncovered, for 45min - 1 hour, or until chicken is fully cooked and no longer pink, or a meat thermometer inserted into the thickest part of the thigh reads 180 degrees.
- Transfer to a platter and garnish with whole olives and reserved oregano sprigs.

Wednesday, January 9, 2013

Butternut Squash Soup

I feel like a broken record when I say this, but I thought I didn't like butternut squash.  That is, until I actually tried it.  Last year I was at a friend's baby shower and they were serving butternut squash soup as part of the buffet, so I decided to try it out.  Boy was I surprised when I actually liked it!  When my husband and I were coming up with a menu for our party this fall, I knew I wanted to serve some sort of soup, so I did a search and came across this recipe.

I've made this soup twice now.  The first time I bought a full butternut squash which I peeled and seeded myself.  I did a bit of searching to find out how to do this and came across this video on YouTube.  The video is about a minute long, so it must be easy to do this yourself, right?  Yeah, not so much.  The cutting and seeding part isn't so awful (though you have to be careful when cutting since you don't have flat surfaces to let it sit securely on), but it's the peeling that was difficult.  The video makes it seem like you can just use a regular vegetable peeler.  But the skin was too thick to do this, and the squash wasn't a good shape to peel, so I ended up doing it all with a paring knife.  It took a very long time, so the next time I made this, I bought the pre-cut squash that my supermarket sells.

The other thing that I realized after the second time I made this that another thing I can change is that I can just use my immersion blender to puree this in the pot instead of having to take the squash out of the pot with a slotted spoon and use a blender, then put it back in the pot to finish off.

This really makes for a wonderful fall/winter dish.  I plan on making this again before winter is over.


Butternut Squash Soup (slightly adapted from this recipe posted on Foodnetwork.com)

Ingredients
2-3 lbs of butternut squash (approx 1 large), peeled and seeded
2 tbsp unsalted butter
1 medium onion, chopped
6 cups of Imagine No-Chicken Broth (vegetable stock can be substituted, or regular chicken stock if you do not keep a kosher home)
salt, pepper, and ground nutmeg to taste

Directions
- Cut squash into 1 inch chunks. 
- In a large pot, melt butter.  Add the onion and cook until translucent (about 8 min).
- Add squash and stock.  Bring to a simmer and cook until squash is tender (about 15-20 min).
- Using an immersion blender, puree the squash and onion.  If you do not have an immersion blender, remove squash and onion chunks with a slotted spoon and place in a blender to puree.  Return the blended squash and onion to the pot.
- Stir and season with nutmeg, salt and pepper.

Wednesday, August 22, 2012

Poached Flounder

When I was first living on my own, I decided that I should try eating like an actual adult and cook real meals, so I went out and bought Rachael Ray's Just in Time.  One of the first recipes I tried was her recipe for Poached Flounder.  In the past, I would eat flounder a few times a month, but mostly just put lemon juice and paprika on it and throw it under a broiler for a bit, so I was excited to have a new way to cook it.  It was so delicious that I started making it every few months.  A few months into dating my now-husband, I decided to cook for him and made this dish.  I'm convinced it's one of the reasons he married me.  Even at my bridal shower, they played a game where they asked me questions and I had to guess his answer.  They asked what his favorite dish I made was his favorite, and without hesitating I knew it was this one.  He knows that I've been trying to make new stuff and try new recipes, but every so often he'll put in a request for the flounder.


What's interesting about this dish, kosher-wise, is that it can be dairy, parve, or meat with minor adjustments.  I normally make it dairy, using butter and vegetable stock, but this time decided to make it a meat dish, using soy margarine and chicken stock.  To make it parve, I'd use the soy margarine and either vegetable stock, or (the best invention ever for Kosher cooking) Imagine No-Chicken Broth.  The recipe actually calls for chicken or seafood stock, but I haven't yet found a Kosher seafood stock, so I'm not sure how that would change the flavor profile.

I don't know if it was the chicken stock or the fact that my chopping skills have vastly improved recently (thanks to a knife skills class at The Brooklyn Kitchen) but this was the best this dish has ever tasted!  This recipe will be staying in regular rotation for a long time to come....


Cheryl's Poached Fish (from Rachael Ray's Just in Time)

Ingredients
2 tablespoons butter
2 tablespoons extra virgin olive oil
1 large shallot, finely chopped
3 garlic cloves, finely chopped
3 tablespoons drained capers
2 teaspoons Worcestershire sauce
3/4 cup dry white wine
3/4 cup chicken or seafood stock
4 (6-8 ox) fillets of flounder or other white fish
Salt
Black Pepper
1 lemon, sliced
handful of fresh flat-leaf parsley, chopped
Crusty bread for mopping


Directions
- In a large skillet, melt the butter into the extra virgin olive oil over medium to medium-high heat.
- Add the shallots and garlic and cook for 3 minutes.
- Add the capers, Worchestershire, and wine, and allow the wine to bubble up and reduce for a minute, then stir in the stock.
- Pat the fish dry and season with salt and pepper on both sides.
- Arrange the fish in the skillet, scatter the lemon slices around the skillet, and poach the fish for 10 to 12 minutes until firm and opaque.
- Scatter the parsley over the fish, then transfer the fillets and sauce to shallow bowls or deep plates and serve with bread for mopping.

Thursday, April 12, 2012

Gefilte Fish

When you hear "gefilte fish" you probably think "ugh, that stuff's disgusting!".  And why?  Because you probably bought a jar of it at the store and that's what you think it's supposed to taste like, and therefore is disgusting.  It's also because you haven't had a piece of gefilte fish made by my grandmother.

Every year for Passover and the High Holidays my grandmother makes her gefilte fish, sometimes making almost 100 pieces at one time!  She has to make this much, because not only does everyone eat it at that meal, but then we all want to take some extra home to eat later.  Those few family members who don't eat the fish are secretly told to accept their piece at the meal so whoever is sitting next to them can have seconds without anyone else knowing (you have to strategically figure out your seating to do this).

As my generation gets older we realize that we should start to learn the traditions of our family so that they can live on well into our own grandchildren's lives and beyond.  A few years ago I let my grandmother know of my intent to learn this skill of gefilte fish making, so we tried to find a good time to get together.  About a week before the set date my grandmother had to call me with the bad news - the fish markets only carry carp and pike during Passover and the High Holidays.  She tried several fish markets in our area and none sold it regularly during the year.  So, we had to put our plans on hold until last Passover when I spent a lovely day being instructed step-by-step by my grandmother.

Of course, the first step is probably the most disgusting - rinsing off the fish heads, skins and bones before putting them in the soup sock.  At least the folks at the fish market took the fishes' eyes out before packaging the heads up for us (ick!).

I slightly revised my grandmother's recipe below to include the tricks and tips she passed along - like grinding everything twice so that it is finely ground and any leftover bones are ground properly.  When I set out last week to make my own batch in my kitchen without my grandmother standing next to me I remembered almost everything she taught me.  But the one thing that I'd change is that when shaping the balls, they shouldn't be actual balls, they should be a little flatter, more like the shape of Reece's Peanut Butter Eggs.  This way they stay better on the plate and you can easily put the horseradish and carrot on top without them rolling off.  I personally like to have mine with just horseradish, no carrot, but most people do like the carrot.  My grandparents (and most people of their generation) like the jelled stock with theirs as well.  And please note the official recipe name - my grandmother came up with that herself.

In this day and age when most people serve the jarred fish or at most buy the loaf that you recook with a few seasonings then slice and serve, it's nice to keep this "old country" tradition alive.  I think the best compliment I received was from my husband's grandparents.  I had sent a few pieces home with them so they could try it and they said that it tastes just like what their mothers used to make.  Now if that isn't flattering, I don't know what is!


Marilyn’s Super Duper Gefilte Fish (my grandmother's recipe)

Ingredients
1 lb white fish
1 lb carp
1 lb pike
1 medium sized onion
1 small carrot
3 eggs, well beaten
2 tsp salt
¼ tsp white pepper
1 tsp sugar
3 tbsp matzo meal
fish heads, skin and bones
1tsp salt
½ tsp pepper
Pinch of sugar
1 carrot, peeled and sliced

Directions
- Have the fish market filet the fish, saving the heads, skins and bones.
- Put the fish heads, skin and bones in a large pot (use a soup sock for easy removal).
- Add 2 qts cold water, 1 tsp salt, ½ tsp pepper, and a pinch of sugar.
- Bring to a boil and boil for at least an hour – while you are preparing the rest of the fish.
-Using the fine blade, put the carrot through the grinder and set aside.  Do the same with the onion.
- Put all fish through the grinder (it is best to slice the fish before grinding it into one inch strips to easily go into the grinder).
- When everything has been ground once, put it all back through the grinder a second time, alternating between handfuls of fish, onion and carrot (always end with the carrot so you know when everything has gone through).  It should be very finely ground.
- Place in a large mixing bowl (you could “catch” it in the bowl from the grinder the second time through).
- Stir in eggs, 2 tsp salt, ¼ tsp pepper and 1 tsp sugar.
- Gradually add about 1/3 cup water to make a soft mixture.
- Stir in matzo meal.  Mix thoroughly.
-Take the pot of fish heads, etc from the stove and remove the contents, retaining the fish broth and strain all the bones, etc thoroughly (if you used a soup sock, just remove it from the pot).
- Carefully bring the broth to a boil.
- With wet hands, make balls out of the fix mixture and place in the boiling broth.  Try not to allow the broth to stop boiling as you place the fill balls in it.
- Add the sliced carrot .  There should be enough liquid to cover the fish, if necessary add more boiling water.
- Cover the pot and bring to a rapid boil.
- Uncover and reduce heat.  Simmer for about 2 ½ hours.
- Shake the pot every 15 minutes or so so that the fish will coko evenly and not stick.
- Carefully remove the fish to a serving platter.
-Strain the stock and place in a glass bowl or glass jar.
- Arrange carrot slices around the fish.
- Cool and refrigerate until the stock jells (sometimes it does and sometimes it doesn’t).
- Serve with horseradish.

***This recipe should make 8 or 9 pieces of fish.
You can double & triple this recipe.  My grandmother has gone as far as 10 times (30lbs of fish) and ended up with 90 pieces of fish.  No adjustment is necessary in any o the ingredients – except maybe with the carrots in the fish mixture – you could subtract one with an order of over 18 pounds of fish.

Wednesday, April 11, 2012

Matzo Ball Soup

A holiday meal at my grandmother's just isn't complete without a bowl of her matzo ball soup.  Before the soup is served my grandmother comes out of the kitchen to ask the all-important question "one or two?" though we all know it's coming and already have our fingers in the air (newcomers to these meals are taught this tradition in advance so they are ready to place their matzo ball order).

Since we were not going to my grandmother's seder this year, I felt it unfair to ask her to bring us leftover soup, so I decided to take on this recipe myself.  I had never made chicken soup from scratch before (unless you count pouring a packet of seasoning into a pot of water and boiling it) so I was excited (and only slightly intimidated) by this undertaking.

When I swung by my grandma's the other day to pick something up I asked her to talk me through this recipe, and I'm glad she did!  She had some great tips for making this that really made it foolproof.  She provided me with "soup socks" so that I could put all the ingredients into it for easy clean-up (I put the chicken, veggies, herbs and cloves in the bag, but put the salt pepper and garlic salt right into the water), and provided me with the schmaltz that she had prepared herself earlier in the week.

Schmaltz is rendered chicken fat, which you can either buy at a kosher butcher, or you can make yourself by melting the fat in a saucepan.  My grandmother adds chopped onions to this and lets it saute, which gives the schmaltz a yummy flavor.  She keeps the onion with some of the schmaltz, but gave me a container w/o the onions.

Because the cooking process takes a long time and the matzo ball mixture has to set twice, I made the matazo ball mix, then as it set for the first hour as I prepped the soup and started that boiling.  Since it boils for 2-3 hours, I then moved the mixture into the fridge until it was ready 3 hours later.

After the first 2 hours I noticed that a lot of the water had boiled out of the pot (I had it mostly covered but left it a little open so it didn't boil over).  I added another qt or 2 of water and let it continue to boil for the last hour.

When the soup was ready, I lifted the soup sock with the chicken and veggies out of the water and used the steamer tray that came with my pot to help drain the extra soup out of the chicken, etc and back into the pot.  Since the chicken was then fully cooked, my husband cut it up and used it for a salad the next day with the cooked veggies.

I then cooked the matzo balls directly in the soup to give it a little more of that flavor.  When it was all done cooking, I let it cool and packaged up the soup and matzo balls separately to store in the fridge.  The next night I put 4 matzo balls and some soup into a small pot, boiled it for a bit and then served it up for a nice delicious meal!

I'm excited to have learned how to make chicken soup from scratch.  Now next time my husband or I are sick I'll just make my own instead of going out to the store to buy some.  I'm sure there's more medicinal quality to homemade chicken soup anyway....


Chicken Soup (my grandmother's recipe)

Ingredients
a chicken
3 carrots
3 stalks celery
parsley
dill
small turnip
parsnip
3 whole cloves
salt
pepper
garlic salt

Directions
-Clean chicken and place in 4qts water.
- Add carrots, stalks celery, a small bouquet of parsley and dill, turnip (cleaned and quartered), parsnip, cloves, salt, pepper, and garlic salt to taste.
- Bring to a boil and let cook at a rolling boil for 2 – 3 hours until chicken is tender.
- Remove all ingredients, strain and serve.
- If the water boils out during cooking, additional boiling water may be added during cooking.  Seasonings may be adjusted at any time.


Matzo Balls

Ingredients
4 eggs well beaten
½ cup cold water
1/3 cup melted schmaltz, warm – not hot
1 tsp salt
1tsp sugar
¼ tsp nutmeg
1 cup matzo meal

Directions
- Mix eggs, water, salt, sugar and nutmeg.
- Add schmaltz and beat well with fork or whisk.
-Add matzo meal and mix thoroughly.  It will be a loose mixture.
- Let stand at room temperature for one hour.  If it is still very loose, add up to ¼ cup of additional matzo meal.
- Put mix in refrigerator for several hours to set.
- In a large pot add salted water to boil.
- Wet hands and form batter into a ball the size of a clementine.   Drop into boiling water and boil for 40 min.
- Remove from liquid and drain in colander.  Serve with hot chicken soup.

Tuesday, April 10, 2012

Geshmearta Matzo

I remember my father making Geshmearta matzo ever year for Passover.  This recipe was created (so I'm told) by my great-aunt.  While I was never a huge fan of cottage cheese, I always looked forward to eating this treat every year.  When I moved out on my own I started making it myself and continue to whip up a batch every Passover.  Even my husband who doesn't like sour cream thinks this is tasty!  I eat it for breakfast or as a snack.

***Update from 2015: due to the decreasing size of the matzo, the number of matzo you end up with increases every year.  The original recipe said it made 11 pieces, when I posted this in 2012 I made 16 pieces, this year I got 21 pieces!  I use Manichewitz matzo, for reference.  I may start making smaller amounts in future years, or giving away a lot of geshmearta!


Geshmearta Matzo (an old family recipe)

Ingredients
¼ lb butter (1 stick), melted & cooled
3lb cottage cheese (I use 2lbs small curd, 1lb large)
4 eggs
½ pt sour cream
¾ c sugar
matzo meal
approx 21 pieces of matzo
Cinnamon to sprinkle

Directions
- Preheat oven to 350 degrees F.
- In a large bowl, mix together the cottage cheese, eggs, sour cream and sugar.  Let sit until it comes almost to room temperature.
- Mix in the melted butter.
-  Add enough matzah meal to make it a good “shearing consistency” (I used about ¾ cup at first, then sprinkled a little more in a few batches in). 
- Schmear 1/3 cup of the mixture onto whole pieces of matzo, leaving some room at the edges; sprinkle cinnamon on top
-Bake for 25-30 min (until the edges of the topping begin to brown).